DO IT YOURSELF

Practicing the Eco-Friendly Four Rs: Repair, Refurbish, Refinish & Repaint
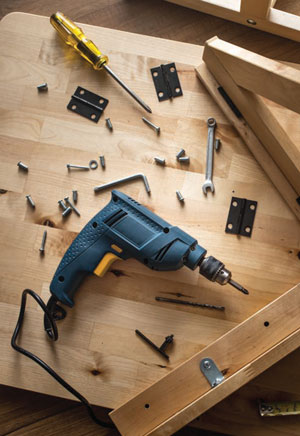
A new trend is sweeping the nation, and if the number of YouTube tutorials, Instagram posts and Pinterest pages dedicated to home improvement projects is any indication, the trend is here to stay. Homeowners young and old are rejecting the “buy cheap stuff, use it ‘til it breaks and then trash it” mentality. Instead, they are making eco-friendly commitments to buy higher quality home goods that can be repaired, refurbished, refinished or repainted instead of purchasing replacements.
The reasons for joining the ranks of the multitudinous Do It Yourselfers (DIYers) are manifold with the most obvious being that fixing things saves you money by extending the life of your possessions and saves the planet by keeping so many old and broken items from going to landfills.
 Other less tangible but nonetheless valuable benefits of practicing the eco-friendly four Rs include the bonding experience that occurs when family and friends work together and the sense of accomplishment that comes from learning new skills. With these benefits in mind, below are four questions to ponder as you select your first DIY project.
- Is the item worth fixing and the job worth doing yourself? Experts advise performing a cost analysis to make that determination. If the cost of the repair/redo is 50% or less of the replacement cost, then it might be a good candidate for a DIY job.
- Can you find a tutorial to teach you how to repair, refurbish, refinish or repaint the item? Let your favorite internet browser help you find detailed instructions with pictures.
- Do you have the tools and supplies you will need? Remember to include any purchases you would have to make in your cost analysis.
- Can you locate the parts necessary for completing the project? Include the price of parts in your cost analysis, too.
If you can answer these questions affirmatively, then you are ready to tackle your first DIY project. Just as practicing the three Rs as a student made you proficient in reading, writing and ‘rithmetic, practicing the four eco-friendly Rs will teach you self-reliance and reward you with savings and the satisfaction of knowing you are doing a good deed for the environment.

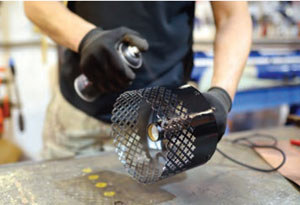
Repair a broken vacuum cleaner
Second only to large kitchen and laundry room appliances, the vacuum cleaner is the most critical tool we use to keep our households running smoothly and is a likely candidate for the first of the four eco-friendly Rs: repairing something. Fortunately, if you have purchased a reputable brand of vacuum cleaner, you can effectively troubleshoot the cause of the breakdown, purchase new parts and install them yourself if you have internet access and a modicum of patience. A quick online search will yield brand-specific manuals, websites for parts purchases and YouTube tutorials showing you how to perform innumerable repairs. Completing the project yourself will spare you the headache of finding a local repair shop to accept your broken vacuum and then waiting to get it back. Frustration is averted, money is saved and one fewer item ends up in the landfill.
Refurbish outdoor furniture
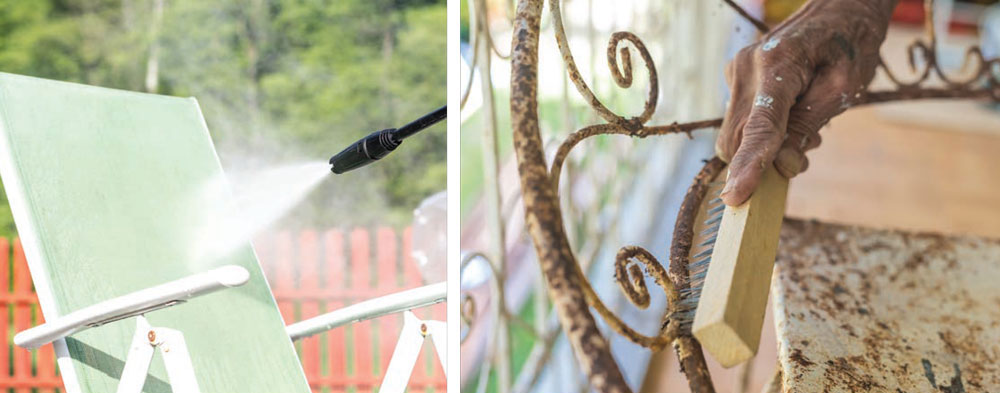
With warm weather here, we naturally want to spend more time outdoors. What better way to enjoy the summertime than to sit outside? For that you will need comfortable outdoor furniture, making the refurbishing of existing or new-to-you pieces a worthwhile activity.
If you have plastic furniture, a thorough cleaning with soap and water on a sunny day will return it to like-new condition, whereas refurbishing metal lawn furniture will require a more extensive list of supplies. To fix up metal furniture, you will need a drop cloth, work gloves, wire brush, a rust-dissolving solution, sandpaper, paint brushes and rust-inhibiting metal primer and paint. Begin by finding a shady spot or empty garage and put your nonslip drop cloth down. Don some old clothes, goggles and chemical-resistant gloves before beginning to remove every bit of rust and any loose paint with the wire brush and sandpaper. Count yourself lucky if this labor-intensive step goes smoothly. If stubborn rust spots remain, apply a rust-dissolving acid according to the manufacturer’s instructions, hose your piece off and dry it well with old rags before applying a rust converter, which will chemically convert any trace rust into a solid substance that coats and seals metal furniture. Finally, you are ready to apply the rust-inhibiting metal primer and paint in three light coats each. Following these steps and applying a little elbow grease in the process will yield impressively refurbished outdoor furniture.
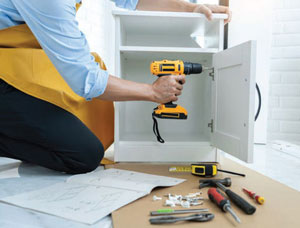 Refinish a bathroom vanity
Patient homeowners can successfully transform outdated bathrooms without calling in professionals. Since bathrooms tend to be small rooms, they can relatively inexpensively be updated with fresh coats of paint or striking wallpaper and cleverly refinished vanities. Fortunately, most bathrooms have wood vanities suitable for refinishing over the course of several days. The steps include removing old paint or stain, sanding, priming and applying new stain or paint and then a sealer. These newly refinished vanities can be further transformed with the installation of new countertops, sinks, faucets and hardware, all by following the simple steps outlined in product guides and demonstrated in YouTube videos. Add the crowning touch to bathroom transformations by hanging new mirrors, installing new towel bars and investing in new towels and bath rugs in eye-popping colors. As in any DIY endeavor, if you feel ill-equipped for the job, call in a professional!
 Repaint your front door
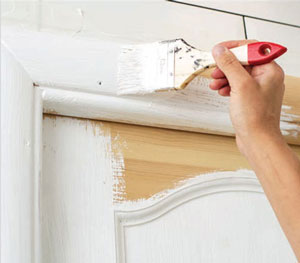
If you believe the adage about first impressions being lasting ones, then repainting your front door makes great sense. A single quart of exterior latex paint in a bold new color will give the outside of your home a radically updated look. Consult home decorating magazines and paint store employees to learn which colors are trending. (The Early Spring issue of HOME offered all the 2023 Colors of the Year).
 Pick up paint store color chips and tape them to your existing front door to aid in color selection. Latex paint in a glossy finish is recommended, along with a companion primer. You can paint your door in place or remove it from its hinges if you have a storm door. Always begin by removing all the hardware before you clean, sand and then wipe down your door. Once these steps have been taken and you’ve got a tarp laid underneath, you are ready to prime the door, let it dry and then brush or roll on two coats of new paint. Your job will be complete when you reattach the new or polished hardware to the repainted door. With minimal time, effort and expense, you will have made an impactful update to your home’s exterior and gotten some valuable practice with the last of the eco-friendly four Rs.
Indeed, a lifelong commitment to repairing, refurbishing, refinishing and repainting your own or secondhand items instead of discarding them and buying new ones will make a lasting difference in our environment — all while sparking joy.
Home DIY Projects for Beginners
Other easy projects for repair, reuse and repainting include:

• Add peel-and-stick wallpaper to an old bookcase to give it a pop of color.
• Update worn or dated doorknobs or light fixtures with spray paint.
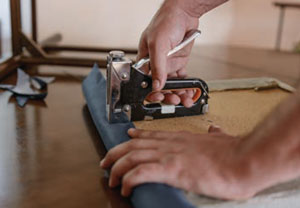
• Make worn couches and chairs new again with trendy covers.
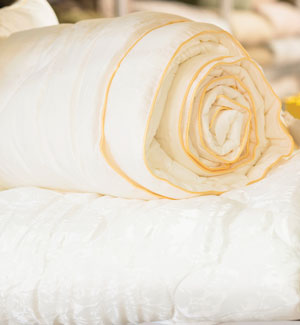
• Repair a down comforter with replacement fill and some stitches — be sure to look up more info on fill weight and power. If it’s looking a little dingy, invest in a new duvet cover.
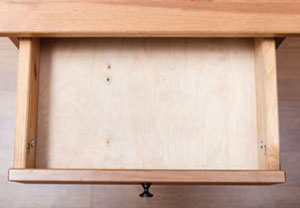
• Wax sticky wooden drawers to help them slide in and out more easily. ✦
bathroom vanity, diy, Do It Yourselfers, front door, home improvement, outdoor furniture, tutorials, vacuum cleaner, YouTube tutorials