Herb Harvest | Preserving Summer’s Bounty

Summer is here! Gardening shops are overflowing with seedlings, and gardeners have already started planting and anticipating a wonderful summer harvest. But there is still plenty of time to add more plants to your garden—especially herbs. When it comes to choosing your herbs, think not only of what you can enjoy freshly snipped during the summer, but also consider what you can preserve to last you through fall and winter. Just like preserving vegetables— which can be an involved process with canning or as easy as freezing—preserving herbs can be easy, fun and rewarding. Imagine seasoning your hearty boeuf bourguignon on a winter’s night with thyme harvested from your own garden, or whipping up a pesto pizza on a busy weeknight with basil you picked fresh and preserved at the peak of flavor.
Planning ahead
The first step to preserving herbs is growing enough so you can enjoy them all summer while also having enough to use later in the year. You can achieve this several ways. Because some herbs are very prolific in summer, and because some herbs grow even faster and bushier as you clip, make plans to snip and save throughout the summer. Alternately, you can plan to grow a few more herb plants than you might otherwise so you have an abundance to save at the end of the season. Ideally, you would do both. Plant extra, and keep clipping, harvesting and preserving throughout the summer.
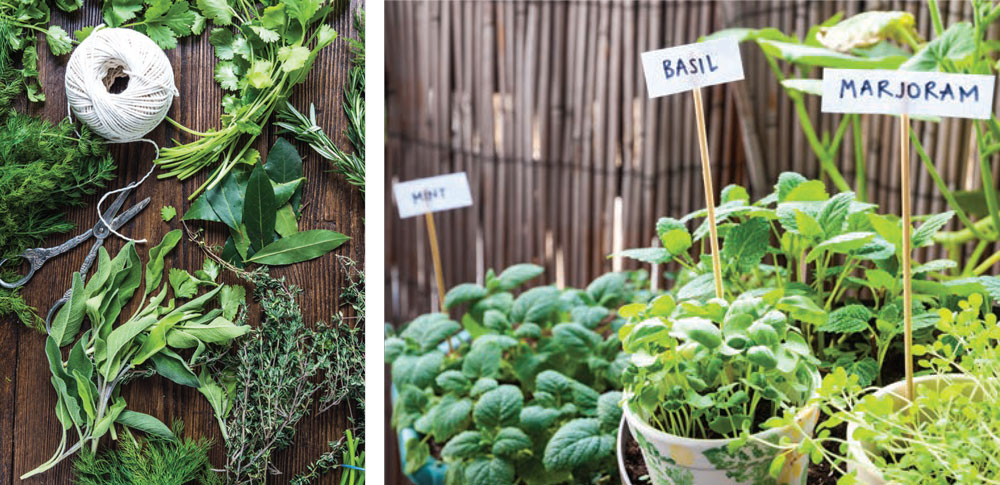
Certainly, choose herbs to grow that you normally use when you cook. Popular and practical herbs include basil, thyme, rosemary, dill and oregano. Dried tarragon is perfect for converting a hollandaise to a béarnaise, and dried mint is handy to have when making lamb sauce or yogurt tzatziki.
Plant herbs according to the instructions included with each pot, noting when to plant, what level sun, and what level water will make them thrive.
Snipping and saving
If you planted herbs in March or April, they should be established by now, and will get even more prolific as summer wears on. If you haven’t started planting, there is still plenty of time to welcome some herb seedlings into your garden.
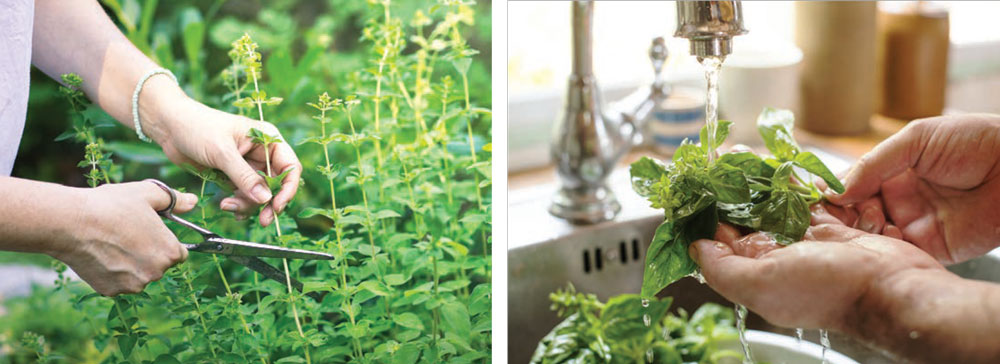
Woody herbs, like rosemary, thyme and oregano, will grow more slowly than herbs like basil and parsley. As such, you might want to plant multiple of the slower-growing herbs and let them grow throughout the summer before cutting. With basil and parsley, these will grow back relatively quickly after cutting, so you can make a few plants do a lot of work, or plant several of each and harvest in large quantities all summer long. Herbs like cilantro and dill might bolt in the later summer heat, so start harvesting those as soon as possible.
Meanwhile, as your herbs are growing, collect containers for any herbs you plan to dry. Ideas include empty bottles, shakers and jars from store-bought spices and herbs, small jam and jelly jars, and small Mason jars. Wash and dry completely and set aside so you can upcycle at the end of the season. If you have a label maker, now is a good time to check the battery and make sure you have ink and paper.
For all these herbs, the process of preserving is similar. It starts with the basics of cutting and washing off any dirt. From there, the process diverges depending on how you plan to preserve them.
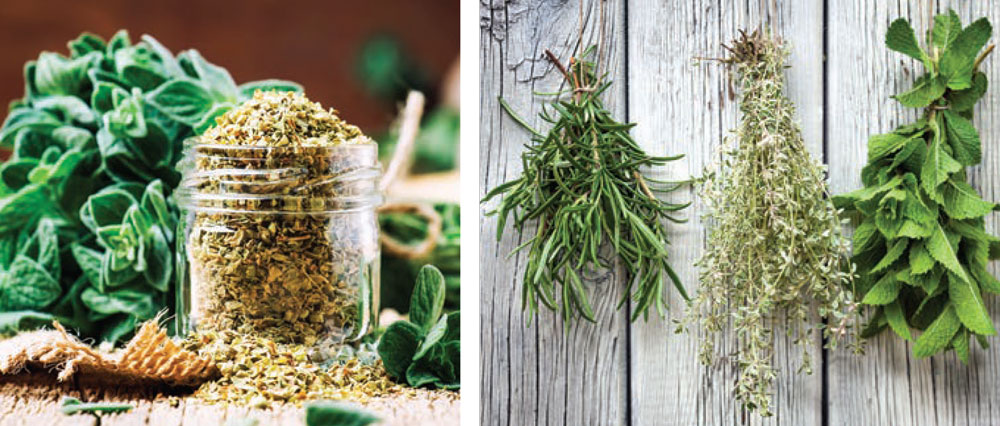
Drying herbs
The least labor-intensive method for preserving herbs is drying them, which can be done with a dehydrator or an oven, or just by leaving them out. If you are letting them dry naturally, you can bunch the herb stalks together and hang them, after washing and shaking off excess water, and letting the remaining drops evaporate. This works very well for woody herbs like rosemary and thyme. More delicate herbs like parsley and basil can be dried quickly in an oven set to the absolute lowest setting, or a gas oven that is naturally warm from a pilot light. You can also use a home dehydrator. For these methods that involve a heat source, after washing you should allow any water drops to dry before placing them in the oven or dehydrator, which will prevent them from steaming.
Once the herbs are fully dried, you can easily remove the leaves from the stalks. If you have a large volume, you can crush the herbs using clean hands or an herb mill to fit more into storage containers. Bear in mind that leaves left whole will preserve flavor better, so ideally you could keep them whole and crush just before using.
Put your dried herbs in your upcycled jars, label, and store in a cool, dry place, keeping them away from sun—the same as storing your store-bought herbs.
 Freezing herbs
Some herbs might be more useful frozen. While this might take up freezer space, you will also have them ready to go if you process before. After washing, separate the leaves from stalks. (This option is better for herbs with larger leaves like parsley, basil and rosemary. It’s exceptionally tedious for herbs like oregano and thyme, whose smaller leaves are harder to manage. Stick with drying those.)
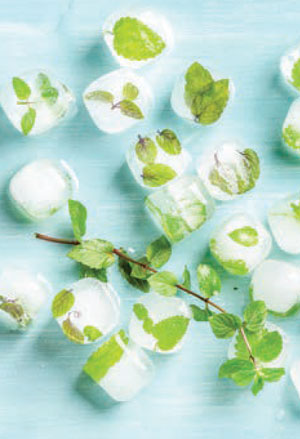
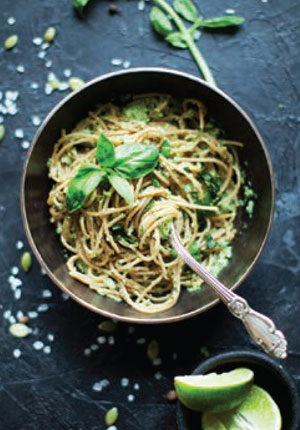
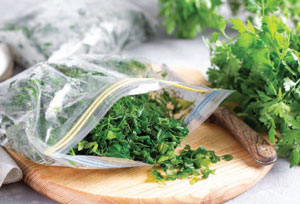 Once you have leaves separated, you can freeze them in plastic baggies or plastic containers. Be sure to label with a permanent marker. If you want to make these herbs even more chef-ready, you can process for their intended use. For example, you can put basil, olive oil, garlic and pine nuts in a food processor, then freeze in ice cube trays. Pop them out when frozen and store the cubes in baggies. Then, you have ready-to-use, homemade pesto cubes to add to sauces or pasta. This also works with chimichurri sauces made with parsley, and you can even freeze mint and lime juice cubes for mojitos in December.
 With some basic planning and a little effort throughout the summer season, you can create your own selection of favorite herbs that will last you until the first buds of spring signal the next growing season. Whether for savory dishes or tasty beverages, have some fun using your home-grown herbs for all your culinary and cocktail creations. ✦
basil, dill, drying herbs, freezing herbs, herb harvest, mint, oregano, preserving herbs, Rosemary, tarragon, thyme, upcycled jars, woody herbs